QR codes for flyers, for when the box has shipped
A flyer is the surface where the gap between designing and distributing is longest. Artwork is approved, the run is printed, the boxes arrive, and only then does anybody scan one in the wild. Everything that can be wrong has already been multiplied by five thousand by the time it is noticed.
The setup, end to end
- Point the code at a short link you own rather than at the landing page directly.
- Print one proof, scan it with a phone that is not yours, and follow the whole journey to the end.
- Tag the drop so a second run to a different area is a different source rather than a guess.
What the tagged link looks like
https://example.com/offer?utm_source=flyer&utm_medium=qr&utm_campaign=autumn-offerAppended when the code is scanned rather than printed into the image, so the tags stay editable after the artwork is on paper. GA4 has no default channel rule for "qr", so these scans report as Unassigned. Add a custom channel group matching medium = qr to give it a name in your reports.
Show me how5 steps
Step 1 of 5
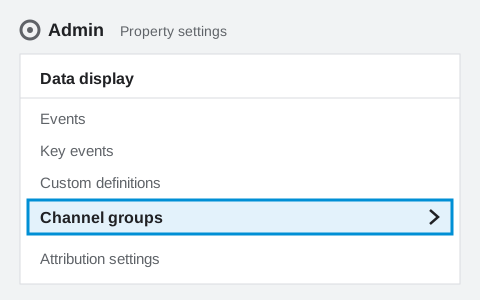
Open Channel groups
In GA4, click “Admin” (the gear, bottom left). Under “Data display”, open “Channel groups”. You need the Editor role or above.
Step 2 of 5
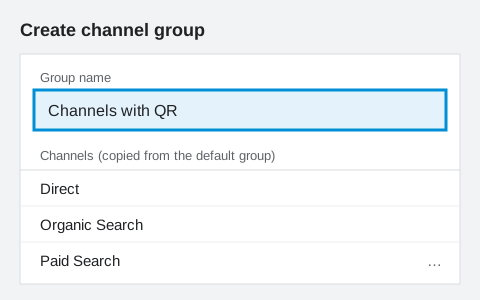
Create a group
Click “Create new channel group” and name it, for example “Channels with QR”. Your first custom group starts as a copy of GA4's default group. A standard property holds two custom groups, so if you already have two, add the channel to one of them instead.
Step 3 of 5
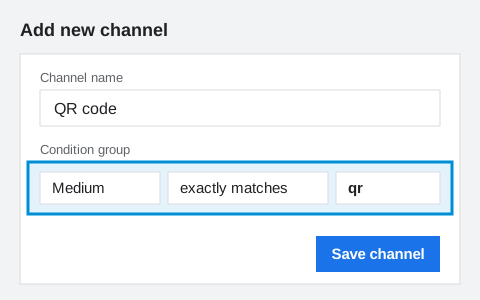
Add a QR channel
Click “Add new channel” and name it “QR code”. Click “Add condition group”, choose “Medium” and “exactly matches”, type qr, then click “Save channel”.
Step 4 of 5
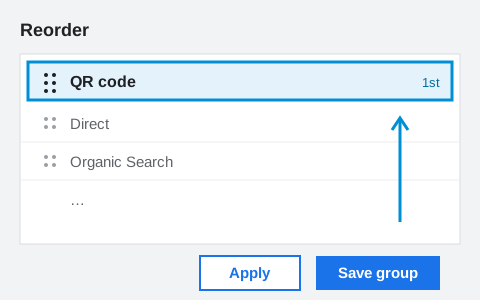
Move it to the top, then save
A new channel lands at the bottom, and GA4 files a session under the first channel that matches. Click “Reorder”, drag “QR code” to the top, click “Apply”, then “Save group”.
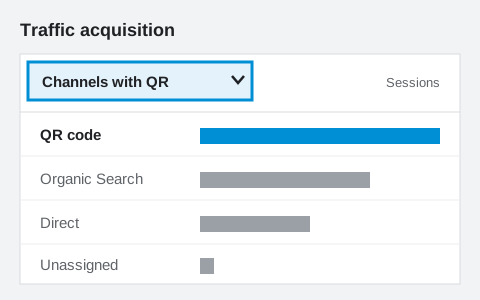
Step 5 of 5
Read it in your reports
Open “Reports”, then “Acquisition”, then “Traffic acquisition”. In the table's dimension menu, pick your group. GA4 may list it as “Session custom channel group” rather than by its name. The group applies to past data too.
What goes wrong here
The destination is wrong, or it is right and then moves. A campaign page that gets renamed after launch takes every printed flyer with it. This is also the surface where a trial expiry hurts most: fourteen days is shorter than the gap between artwork and distribution, so the codes can be dead before the first box is opened.
What it costs
- Live codes
- 3 free, unlimited on Pro
- Scans
- Never capped, any plan
- History
- 7 days free
- Expiry
- None, including after you stop paying
On a flyer
Read from reading distance, so the code can be small, and the real constraint is the quiet zone rather than the size. Leave clear space around it and keep it off the fold.
A common starting point is a code about a tenth as wide as the distance it will be read from. Print one at that size, scan it with the oldest phone you can find, and adjust. No table can answer this for your paper and your lighting.
Show me how to size it5 steps
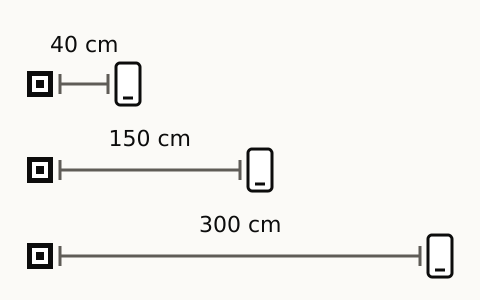
Step 1 of 5
Find the scanning distance
Stand where somebody will stand to scan it, and measure to where the code will be. A table tent or a business card is read from arm's length, a window poster from the pavement, a car from the pavement or the car behind.
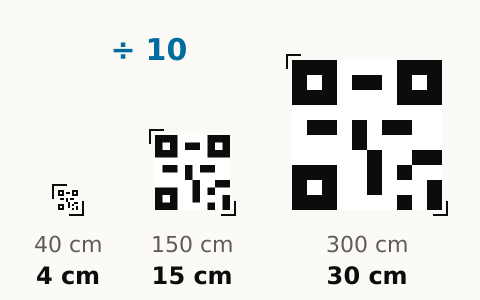
Step 2 of 5
Make it about a tenth of that distance
A common starting point is a code about a tenth as wide as the distance it is read from. From forty centimetres that is about four, from three metres about thirty. Keep a clear white margin around it.
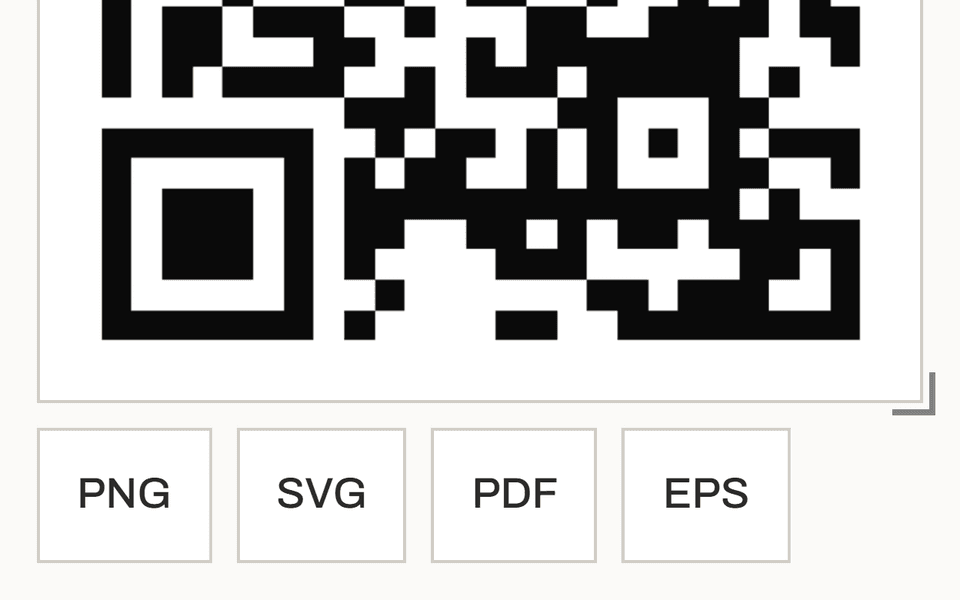
Step 3 of 5
Download the file that fits the size
For a flyer, a card or a table tent, the PNG is enough. For a poster or a car, take the SVG or the PDF, which stay sharp at any size. On a Free account the code's page offers the PNG; SVG, PDF and EPS come with Pro.
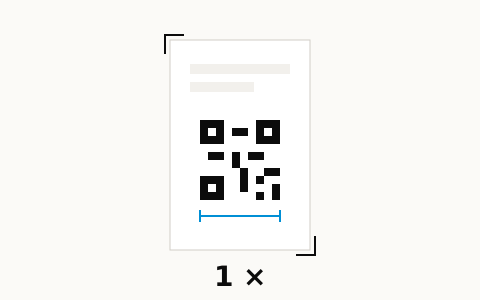
Step 4 of 5
Print one proof
Print a single copy at that size, on the paper or vinyl the run will use. Matt stock scans better than gloss, and a fold or a foil finish across the code can stop it scanning.
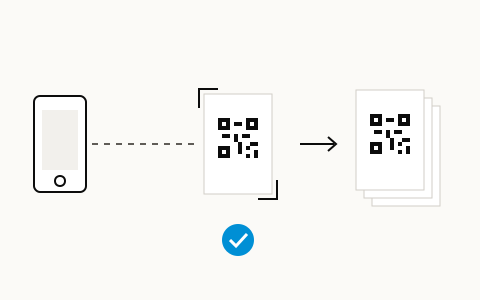
Step 5 of 5
Scan it from the real distance, then print the run
Stand at the distance from step 1 and scan the proof with the oldest phone you can find, in the light it will hang in. If it hesitates, make the code larger and print another proof. When it scans at once, print the run.
No card. Nothing you print here stops working.